Andi’s Favorite Band Exercise
Keep your upper back strong and pain-free with this seated row from SilverSneakers Master Trainer Andi.
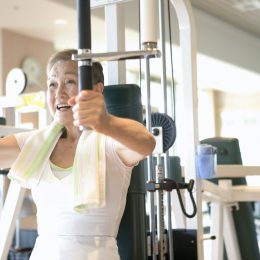
One of the most versatile and effective workout tools is the resistance band. It’s inexpensive, doesn’t take up a lot of space, and allows you to strengthen your body from multiple angles.
There are many different types of bands, but the one you’ll see in SilverSneakers classes is elastic tubing with handles. “It’s an excellent piece of equipment,” says SilverSneakers Master Trainer Andi. Her favorite band move: the seated row. “There’s so much variation we can do with a rowing exercise with the elastic tubing. It’s a great way to strengthen your upper back.”
Why are the muscles in the upper back so important? They stabilize your shoulders, keep your spine aligned, and protect your posture. If you want to prevent a hunchback and upper-body pain, then you’ll want to add exercises like the row to your workouts.
Ready to take a page from Andi’s playbook? Here’s how to do a row with a band, plus her favorite variations to try.
How to Use the Seated Row
You’ll need a sturdy chair and elastic tubing with handles. If you don’t have a band, you can do the moves with just your body by squeezing your muscles to create tension. Press play on the video above and follow along, or check out the step-by-step instructions below.
As with any workout tool, there are a few form tips to be aware of when using bands. “It’s very important that you consider the anchor point,” says Andi. With this seated row, you’ll step on the tubing and then anchor it with your feet flat on the floor. This way, it’s secure between your feet and the floor.
“I do not like the position where legs are extended out in front, heels are down, and toes are up because we risk the tubing rolling off our shoes,” Andi says. “It’s a big rubber band, and it could hit us in the face.”
What else to keep in mind for the row exercise: Focus on bending from your elbow, not your wrist. “You want your energy to come from your elbow—your wrist is just along for the ride,” Andi says. “Keep your wrist in line with the rest of your arm bone.”
If you’re taking a SilverSneakers LIVE class, your instructor will guide you through the exercise. If you’re working out on your own, do up to three sets of six to 10 reps per side.
As always, safety is key. These exercises may be different or more advanced than those you’ll experience in a SilverSneakers class. If you have a chronic condition, an injury, or balance issues, talk to your doctor about how you can exercise safely.
Subscribe to our newsletter
It's quick and easy. You could be one of the 13 million people who are eligible.
Already a member? Click to discover our 15,000+ participating locations.
Follow Us
Variation #1: Row with Palms Facing In
Sit forward in your chair, and anchor the tubing underneath your feet with your feet flat on the floor. Your feet can be about hip-width apart, or place your feet closer together for less resistance or wider apart for more resistance.
Grab the handles so that your right hand is holding on to the left handle and your left hand is holding on the right handle. Sit tall with your chest up and your shoulders back and down.
Start with your hands close together above your thighs and palms facing each other. Draw your elbows back behind you. Pause, and then slowly release your arms back down.
Variation #2: Row with Palms Facing Down
Begin in your row position, but with your palms facing down. Draw your elbows out and back to bring your wrists toward your shoulders. Focus on leading the movement from your elbows and keeping your wrists in line with your forearms. Pause, and then slowly release your arms back down.
Variation #3: Single-Arm Row with Rotation
Begin in your row position with your palms facing in. Draw your right elbow back, and gentle rotate your torso to the right. To protect your back, keep your core engaged, and rotate only up to 80 percent of your full range of motion. Pause, and then slowly release back to center. Perform all reps, and repeat on the other side.