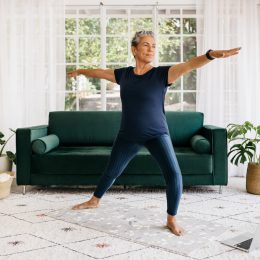
6 Must-Know Exercise Modifications If You Have Back Pain
Get a great workout without aggravating your back.

Sherri Betz doesn’t like the word “bad.”
“People come in and say, ‘I have a bad back,’” says Betz, a physical therapist and board-certified specialist in geriatric physical therapy. “I’m like, ‘No, you probably don’t have a bad back. You have pain in your back.’”
What’s the difference? “Bad back” suggests permanent damage, says Betz, but most back pain can be treated with the help of a physical therapist.
Strengthening the muscles that support your back can help. Those key muscles include your abdominals, your glutes, and your legs.
But depending on what kind of back pain you have, certain exercises can hurt. Common culprits include exercises that put you in these positions:
- Forward bending
- Backward bending
- Side bending
- Twisting
Luckily, exercises can always be modified. Let’s look at some examples.
Get and stay fit with SilverSneakers! Choose from dozens of different Community classes, visit a participating fitness location, or view the current schedule of SilverSneakers LIVE online classes.
Instead of: Crunches
Try: Alternating Toe Taps
Why? Crunch-like movements are supposed to target your abdominals, but the problem is a lot of people end up underusing their abs and overusing their hip flexors. Your hip flexors are a group of muscles toward the front of the hip that help bring the thigh and torso together.
“People say, ‘This bothers my back’ because they’re not keeping their back under control using their abdominals,” Betz says.
You may end up overarching your back, causing pain. Betz recommends avoiding crunch-like movements, instead keeping your back flat on the floor and lifting your legs instead of curling up your head.
Adding a strap under your back can help you self-correct.
How to do it:
- Lie on your back, knees bent and both feet on the floor.
- For extra support, you may place a yoga strap under your low back, just opposite the naval, holding one end of the strap in one hand. (You can also use a bathrobe belt, necktie, or dog leash, Betz says.)
- Pressing your low back into the floor or strap, slowly lift one leg straight up to a 90/90 position (90 degrees at the hip and 90 degrees at the knee, sometimes called tabletop position).
- Lower your leg back down and repeat with the other leg.
- Perform 5 to 10 reps with each leg.
Tip: If you’re using a strap, give it a tug as you lift your leg to make sure it stays under your back. If you can pull it out from under your back, that means you’re overarching and not properly engaging your abs, Betz says. Keep your back pressed into the strap so you can’t pull it out.
Instead of: Squats
Try: Chair Squats
Why? A squat should work your butt and thighs. But if those muscles are weak your back may take over the move, says Malcolm White, a physical therapist at the Shirley Ryan AbilityLab in Chicago.
“You may see older adults get in that rounded posture and over-rely on their back, while trying to do a squat,” White says. “They use their back more than their legs.”
Likewise, if you struggle with balance or ankle mobility, you may feel safer bending your back than you do staying tall and engaging your legs, adds Jessica Curran, clinical manager and physical therapist at the AbilityLab.
If that’s you, try the variation below from SilverSneakers Master Trainer Andi Kwapien:
How to do it:
- Sit forward in a chair with your chest up tall.
- Begin with your hands on your hips or thighs, and feet planted firmly on the floor below your knees.
- Hinge at your hips to lean forward slightly, and put some of your weight into your feet.
- Hinge back to sit tall.
- As you hinge forward, bring your arms out in front of you, and put more of your weight into your feet as if you are about to stand up. But instead of standing up, stay in this position, squeeze your glutes, and then hinge back to sit tall.
- Push through your feet to lift yourself up to standing.
- From this standing position, walk your feet back until you can feel the chair on the backs of your legs.
- Push your hips back to lower down, making sure the chair is beneath you.
- Walk your hips forward by shifting your weight back and forth to return to starting position.
- Do 2 to 3 sets of 10 reps.
Make it harder: Progress to a Wall Squat. Keeping your back against a wall helps you stay in a neutral, pain-free position, Lamothe says.
How to do it:
- Start with your back against a wall and your feet 1 to 2 feet in front of you, hip-width apart.
- Slowly bend your knees and slide your back down the wall as if you’re sitting in an invisible chair.
- Straighten your knees to slide back up the wall, returning to the start position.
- Do 2 to 3 sets of 10 reps.
Instead of: Toe Touches
Try: Seated Hamstring Stretch or Figure-4 Seated Stretch
Why? Often, when people bend forward to touch their toes, they end up rounding their back, putting stress on the spine. That can trigger back pain if you have a muscle strain, ligament sprain, or disc problem, Betz says.
You don’t have to touch your toes to stretch your hammies, though. You can do it while seated in a chair.
How to do it:
- Sit tall in a chair with good posture and both feet on the floor.
- Slowly straighten one leg and pull your toes back.
- Do a very slight hip hinge—meaning lean forward a bit at the hips (not the waist) while keeping your back in a neutral position.
- Hold for 10 to 30 seconds.
- Return to start and repeat the stretch with the other leg.
Make it harder: To work your midback muscles, add a rowing move, Betz suggests.
- Wrap a resistance band around the foot of the leg you are straightening. (Note: The video shows the exercise with both legs extended. Both versions are good to try.)
- While holding the hamstring stretch with your leg straight, perform the row: Pull your elbows back, and then straighten them again.
- Do 4 or 5 rows on each side.
Tip: If you have been diagnosed with sciatica pain, ask your doctor or physical therapist to recommend specific stretches, says Meghan Lamothe, P.T., D.P.T., an orthopedic clinical specialist at the Hospital for Special Surgery, in New York City.
Lamothe says hamstring stretches may not be advised for those with sciatica. Because the sciatic nerve runs down the back of the leg, stretching your hamstring will stretch the nerve too, she explains.
“But the nerve is not stretchy like the muscle,” Lamothe says. Putting tension on the nerve can further irritate it, causing more pain.
Instead, she suggests, try this Figure-4 Seated Stretch:
How to do it:
- Sit tall in a sturdy chair with your feet flat on the floor.
- Cross your left ankle over your right thigh. (Be sure it’s on your thigh and not your knee.)
- Gently press your left knee down toward the floor, allowing your torso to lean forward slightly as you do.
- You should feel a stretch in your left hip and glute.
- Keep your chest lifted.
- Hold here for a few seconds, and then repeat on the other side.
Instead of: Overhead Dumbbell Press
Try: Overhead Reach Against a Wall
Why? Some people don’t have the ability to lift their arms overhead without compromising the back, Betz says.
“What happens when they try to lift overhead is they push the pelvis forward and increase the arch of the back,” she explains. You end up bending backward.
“Often, older adults with a history of back pain direct their body movements from their distal extremities,” Betz says. “So it’s like, ‘Okay, I’m going to reach my arms overhead. I don’t care what my spine is doing.’ I think of it as the tail wagging the dog instead of the spine being command central.”
Subscribe to our newsletter
It's quick and easy. You could be one of the 13 million people who are eligible.
Already a member? Click to discover our 15,000+ participating locations.
Follow Us
For adults with lumbar stenosis — when the spaces in the lower spine narrow and the nerves no longer have room for comfort — a backward-bending position can pinch the nerves and cause pain that extends into the buttocks and down the legs, Betz says.
By performing the movement with your back against a wall, you can keep your back in a neutral position, reducing pain, says Betz, who recommends you skip the dumbbells if you have back pain.
How to do it:
- Stand with your back against a wall, your head, midback, and butt touching the wall. Keeping those three points of contact helps align the back, Betz says.
- Note: You can also perform this movement sitting down with your back firmly against a chair back.
- Keeping your arms fairly straight, slowly raise your arms overhead until your thumbs touch the wall (or as far as you comfortably can go).
- Hold for 5 counts.
- Lower your arms back down. That’s 1 rep.
- Do 10 reps.
Instead of: Glute Bridges
Try: Elevated Donkey Kicks
Why? The glute bridge is great for glute strengthening — important if you have a bad back. But lift too high and you’ll end up in that backbend position that triggers pain in those with stenosis, Lamothe says.
If you can’t do a glute bridge with good form — which might be the case if you have tight quadriceps or hip flexors — the donkey kick, done from a standing position, may help you target your glutes while keeping a neutral back, says Kwapien.
How to do it:
- Stand tall and place a hand on your chair for balance.
- Engage your core by pulling your belly button in.
- Shift your weight to one foot.
- Lift the opposite foot a few inches off the floor.
- Hinge forward slightly at your hips as you push the lifted heel behind you to extend your leg.
- Think about pushing something away from your body.
- From here, bring the extended leg back in to return to standing.
- Do 2 to 3 sets of 10 reps.
- Switch legs and repeat the exercise.
Make it harder: Perform the donkey kick with your hands on a sturdy table (arms straight) or on the floor.
Instead of: Side Bends
Try: Modified Side Planks
Why? If you have stenosis, side-bending (like back-bending) can compress the facet joints and pinch the spinal nerves, causing pain on one side, Lamothe says.
“If you’re bending toward the right with the lower back, then it may hurt on the right side,” Lamothe says. “And if you’re bending toward the left, it may hurt on the left.”
A side plank works the same ab muscles as a side bend — the obliques and the quadratus lumborum — but keeps your back straight.
How to do it:
- Lie on your left side with your legs extended and feet stacked.
- Bend both knees.
- Prop your upper body up on your left forearm with your elbow bent and directly underneath your shoulder.
- From here, raise your hips so your body forms a straight line from head to knees.
- Rest your right hand on your left shoulder or your right hip.
- Hold for 30 seconds, or as long as you can with good from.
- Repeat on the opposite side.
Tip: Balance your weight between your forearm and your knees.
- Variation: Do the move with just the bottom leg bent. Lift your hips so your body forms a straight line from head to the ankle of the top leg.
Take Your Favorite SilverSneakers Classes Online!
SilverSneakers members can access live fitness classes and wellness workshops through SilverSneakers LIVE. See the latest schedule and RSVP for classes here.
Not a member? If you have a Medicare Plan, it may include SilverSneakers—at no additional cost. Check your eligibility instantly here.
Not eligible for SilverSneakers? You can still get 200+ free SilverSneakers On-Demand videos and stay in touch with us by creating your online account