5 Yoga Poses for Total-Body Strength
Build muscle from head to toe and boost your confidence with these moves.
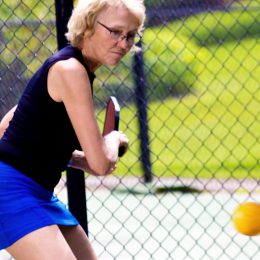
You know that yoga can ease stress and relax your body. But you may not realize it can effectively build strength and balance too.
Case in point: Women who practiced vinyasa, a vigorous type of yoga, at least two times a week for a year had more muscle mass and less fat than inactive women, according to a study in the Journal of Aging and Physical Activity.
This particular study looked at challenging and weight-bearing yoga forms, says Layne Nordquist, C.P.T., an area director and master trainer at VASA Fitness in Denver.
But even gentler forms of yoga can boost strength. In fact, yoga often counts as a “multicomponent activity” that combines different types of exercise—strength, balance, flexibility—into one workout, according to the latest fitness guidelines.
For older adults, multicomponent activities help improve function and decrease the risk of falls.
Ready to improve your total-body strength? Here are five yoga moves to help you build muscle—and feel more confident in your body.
How to Use These Yoga Poses
You’ll want clear space and a mat. If you’d like support, perform these poses near a wall you can grab or a chair to help you make moves easier. You can also perform these moves with or without shoes on, whichever is safest and most comfortable for you.
You can pick one or two poses to try at a time, or you can do them together as a yoga sequence. After warming up, perform each yoga pose as directed, focusing on good form and proper yoga breathing.
As always, safety is key. The yoga poses here may be different or more advanced than those you’ll experience in a SilverSneakers class. If you have a chronic condition (including osteoporosis), an injury, or balance issues, talk to your doctor about how you can exercise safely.
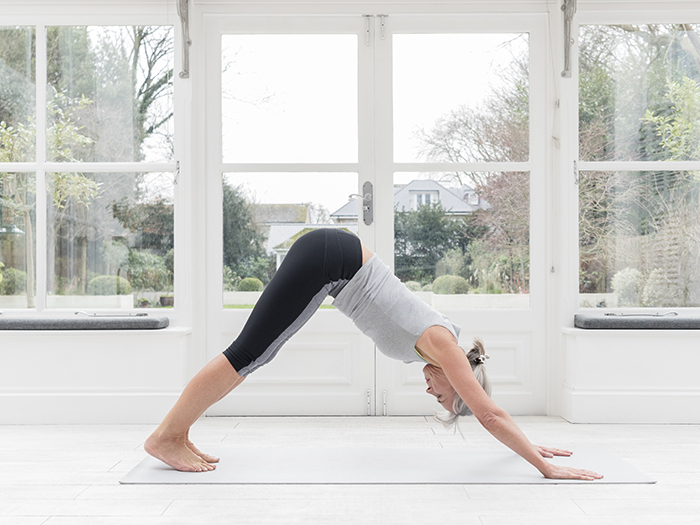
Strengthening Pose #1: Downward-Facing Dog
Hold the pose for 3 to 5 breaths
How to do it: Get down on all fours with your knees underneath your hips and your hands slightly in front of your shoulders. Make sure your palms have good contact with the floor, and engage your belly.
Press into the floor with your hands and feet, gently drawing your hips toward the ceiling so your body forms an upside-down V. Engage your back, and keep your shoulders down and away from your ears. Feel the stretch in your legs, but let your knees bend and heels stay lifted as much as you need to. Breathe here for three to five breaths, then gently return to the starting position.
Make it easier: Try downward-facing dog with chair. Place your hands on the back of a sturdy chair. Hinge at your hips, and take a few steps back, straightening your back and legs. Learn more in this guide to yoga moves that ease back pain.
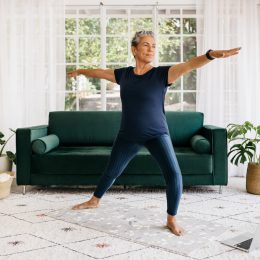
Strengthening Pose #2: Warrior Two
Hold the pose for 3 to 5 breaths per side
How to do it: Turn your left toes out toward the left. Bend your left knee about 90 degrees, keeping your knee above your ankle and heel. Keep the outer edge of your right (back) foot firmly on the floor. Engage your belly.
Extend your arms out at your sides with your palms facing down, and gaze out over the middle fingertips of your left hand. Breathe here for three to five breaths, then gently return to the starting position. Repeat on the other side.
Make it easier: If you need more support, place your hands on your hips, and simply gaze to the side.
Strengthening Pose #3: High Plank
Hold the pose for 3 to 5 breaths
How to do it: Get down on all fours with your knees underneath your hips and your hands underneath your shoulders. Make sure your palms have good contact with the floor, and engage your belly.
Extend your legs behind you, balancing on the balls of your feet so your body forms a straight line from head to ankles. Keep your shoulders down and away from your ears, and squeeze your glutes and thighs. Breathe here for three to five breaths, then gently return to the starting position.
Make it easier: Try high plank against a counter or wall. The taller the object or more upright you are, the easier the move.
Subscribe to our newsletter
It's quick and easy. You could be one of the 13 million people who are eligible.
Already a member? Click to discover our 15,000+ participating locations.
Follow Us
Strengthening Pose #4: Chair
Hold the pose for 3 to 5 breaths
How to do it: Stand with your feet hip-width apart, making sure your knees and hips are facing forward. Engage your belly.
Sit back, bending your knees and lowering your hips as if you are hovering over a chair. Keeping your weight in your heels, reach your arms forward for counterbalance. Breathe here for three to five breaths, then gently return to the starting position.
Make it easier: Start with seated chair pose. Pretend you’re glued in the chair and you’re trying to get up. Get more pointers in this beginner’s guide to chair pose.
Strengthening Pose #5: Bridge
Hold the pose for 3 to 5 breaths
How to do it: Lie on your back with knees bent, feet flat on the floor about hip-width apart, and heels a few inches away from your buttocks. Press your arms into the floor for support, and engage your belly to minimize the arch in your lower back.
Push through your heels and squeeze your glutes to lift your hips up until your body forms a straight line from knees to shoulders. Clasp your hands underneath your back, feeling a stretch in your upper body. Breathe here for three to five breaths, then slowly return to the starting position.
Make it easier: Keep your hands on the floor for support.
Take Your Favorite SilverSneakers Classes Online!
SilverSneakers members can access live fitness classes and wellness workshops through SilverSneakers LIVE. See the latest schedule and RSVP for classes here.
Not a member? If you have a Medicare Plan, it may include SilverSneakers—at no additional cost. Check your eligibility instantly here.