Yoga for Beginners: Horse Pose
Boost mobility, stability, and lower-body strength with this multitasking posture.
A long list of everyday actions involve stepping out to the side: getting in and out of the shower or tub, stepping onto a high curb with one foot, or walking sideways down a narrow airplane aisle, to name a few. Horse pose helps you do all that and more with ease, says Terecita “Ti” Blair, the 2017 SilverSneakers Instructor of the Year.
“All of these movements require a combination of strength, mobility, and stability at once,” Blair says. “Horse pose helps by improving range of motion in the hips and inner thighs while also building lower-body strength and core stability.”
Ready to give it a try? Use her guide below to find the version of horse pose that best suits your body. As always, safety is key. If you have a chronic condition (including osteoporosis), balance issues, or injuries, talk to your doctor about safe exercise.
Step #1: Separate Your Feet
Stand with your feet about shoulder-width apart and your knees slightly bent. With your belly engaged and chest lifted, roll your shoulders up, back, and down. From this grounded stance, separate your feet as wide as comfortable.
Step #2: Turn Feet Out
In your wide stance, turn your toes out about 45 degrees. If you were standing on a clockface, they’d point toward 10:00 and 2:00.
Step #3: Sink to Your Lowest Point
Keep your chest lifted as you bend your knees and sink down as low as you can. Make sure your knees stay behind your toes and don’t roll inward. You should be able to see your toes on either side.
Keeping your upper body tall and belly engaged, bring your hands together in front of your heart.
Step #4: Root Down and Breathe
You’re now in horse pose. Continue drawing your knees back while rooting down through your heels to engage your lower body. Stay here for a few breaths. You will feel this right away, so you may only be able to pause for one or two breaths. Remember to keep breathing!
Subscribe to our newsletter
It's quick and easy. You could be one of the 13 million people who are eligible.
Already a member? Click to discover our 15,000+ participating locations.
Follow Us
Step #5: Return to Mountain
On an exhale, push through your feet to straighten your legs. Heel-toe your feet back toward each other (move your toes in then your heels in) until you are in mountain pose. Click here for a refresher on mountain pose.
Step #6: Make It Your Own
To make this pose easier, practice seated horse: Sit tall in a chair with your feet flat on the floor and hands on your hips. Take your knees out wide, and turn your feet out about 45 degrees. Keeping your belly drawn in and chest lifted, root down through your feet and inhale. As you exhale, lift your butt off the chair about one inch. Hold as long as you comfortably can, and then lower. Work up to five reps up and down with your breath. When you’re ready for more of a challenge, try holding the “floating” horse position for three to five breaths.
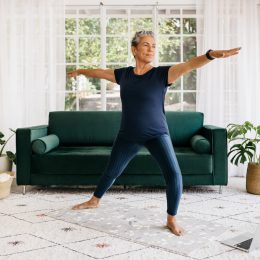
To make it harder, lift your arms out to your sides, in front of you, or overhead for more upper-body strengthening. You can also lift your heels to challenge your balance.
Want to Do Yoga with Us?
SilverSneakers offers free access to gyms and fitness classes—including SilverSneakers Yoga and yoga classes through SilverSneakers FLEX. Check your eligibility or find a location here.